On the morning of July 12, 1943, a large Japanese force was spotted heading towards the islands of Kolombangara and New Georgia in the Solomon Islands; they were to make an indelible mark on New Zealand naval history.
HMNZS Leander joins US Task Group
HMNZS Leander – view gallery of images
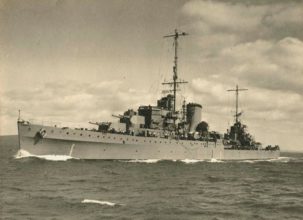
New Zealand Cruiser, HMNZS Leander with 550 crew had been serving as an escort ship in the Pacific, under American command since the previous June. In early July 1943, she was ordered to join the US Navy’s Task Group 36.1 at Tulagi, an island north of Guadalcanal as a replacement for the American cruiser, USS Helena which had sunk at the Battle of Kula Gulf on 6 July.
The Japanese force speeding towards Kolombangara that morning included an escort force of a cruiser, HIJMS Jintsū, with five destroyers supporting four further destroyers carrying troops and supplies from their base at Rabaul. The Japanese practice of using the cover of night to deliver personnel, supplies and equipment to their forces operating in and around New Guinea and the Solomon Islands was famously referred to by the Allies as the ‘Tokyo Express’.
In response to the sighting of the Japanese force, HMNZS Leander along with the American cruisers USS Honolulu and St Louis and ten destroyers making up Task Group 36.1, departed Tulagi at 5pm that evening. Their orders were to intercept the Japanese ships and prevent the destroyers from landing men and supplies. At 11pm all the ships were ordered to action stations. At 12.30am on the morning of 13 July, an aircraft advised the task group that a cruiser and five destroyers had been sighted heading in the direction of Task Group 36.1. Speed was increased to 28 knots and the forces approached each other on parallel courses. Unknown to Task Group 36.1, an hour earlier the Japanese had detected radar signals from the approaching ships. However, it wasn’t until 1am that the Task Group had a visual sighting of the Japanese ships, immediately opening fire with their guns and torpedoes.
The battle begins
Inexplicably, and with dire consequences, HIJMS Jintsū turned on a searchlight making herself a target for all the gunners. Leander fired 160 shells at the Japanese cruiser which having taken a heavy pounding was quickly wrecked. Before falling out of the action, fire from Jintsū cut the main aerial cable on Leander. The five destroyers accompanying Jintsū quickly fired 29 of their fearsome Long Lance torpedoes towards the Task Group ships. Just 17 minutes into the action, Task Group Commander, Rear Admiral Ainsworth using the Talk-Between-Ship voice radio system ordered the Task Group to make a simultaneous 180 degree turn south. Due to defects in the communication system HMNZS Leander didn’t receive the order. USS Ralph Talbot was the only rear destroyer to receive the message. With communication patchy at best, and gun smoke obscuring any chance of seeing what was happening, all the ships continued to fire furiously at the Japanese. In the midst of the firing, with visibility at a minimum, Leander found herself forced to take last minute evasive action to avoid a collision with USS Honolulu, who belatedly was following orders to turn to port.
The confusion continued with little or no inter-ship communication, the cruisers were bunched up and Leander after making a wide turn to follow a new course, now found herself behind the American cruisers. At 1.22am, as she straightened up and followed USS St Louis a Long Lance torpedo, struck her midships on the starboard side, its contact detonator setting off the 500kg warhead. The torpedo had first been sighted 90m from the ship. A twelve metre wide by six metre deep hole was blown into the side of Leander. The cruiser came to a sudden halt as the engines were ordered to stop.
“This almighty thump hit the ship, and it was just as though another ship had hit you right in the middle. We went over to starboard and then she slowly recovered back to port. When she went back to port, they said at 11 degrees or 10 degrees or whatever, she stopped there, there was no movement she didn’t come back again. We didn’t know exactly what had happened. The last thing I thought was a torpedo hitting, I thought gee we’ve hit another ship,” recalled Chief Electrician Robert Harvey on board Leander at the time.
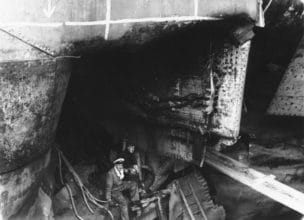
Torpedo damage HMNZS Leander – view gallery of images
Eerily, the ship went silent as power went out and forward momentum stopped. Twenty-eight sailors were killed instantly in the explosion, most in the boiler room where the torpedo had struck. Seven men manning one of the antiaircraft guns were blown overboard by a plume of water forced up through a vent. Unfortunately, the ship had travelled some distance before it was realised that they were lost overboard. A further fifteen men were injured in the attack. Fijian sailors, Ordinary Seaman Savenaca Naulumatua and Able Seaman Timo Puamau, were both killed during the attack.
Two destroyers stood by the now immobile Leander which had no power, all auxiliary machinery was out of action, no communications apart from sound powered telephones and no gunnery fire control. Commander Stephen Roskill, the Executive Officer known as the ‘Black Mamba’ for his obsessive focus on damage control, was wounded and had nearly been swept overboard. He bravely directed the teams working throughout the ship. The fifteen wounded men were treated in the sick bay. Most had suffered broken bones and fractures. Medical personnel worked for eighteen hours without a break to treat the patients, fortified only by lime juice and salt tablets.
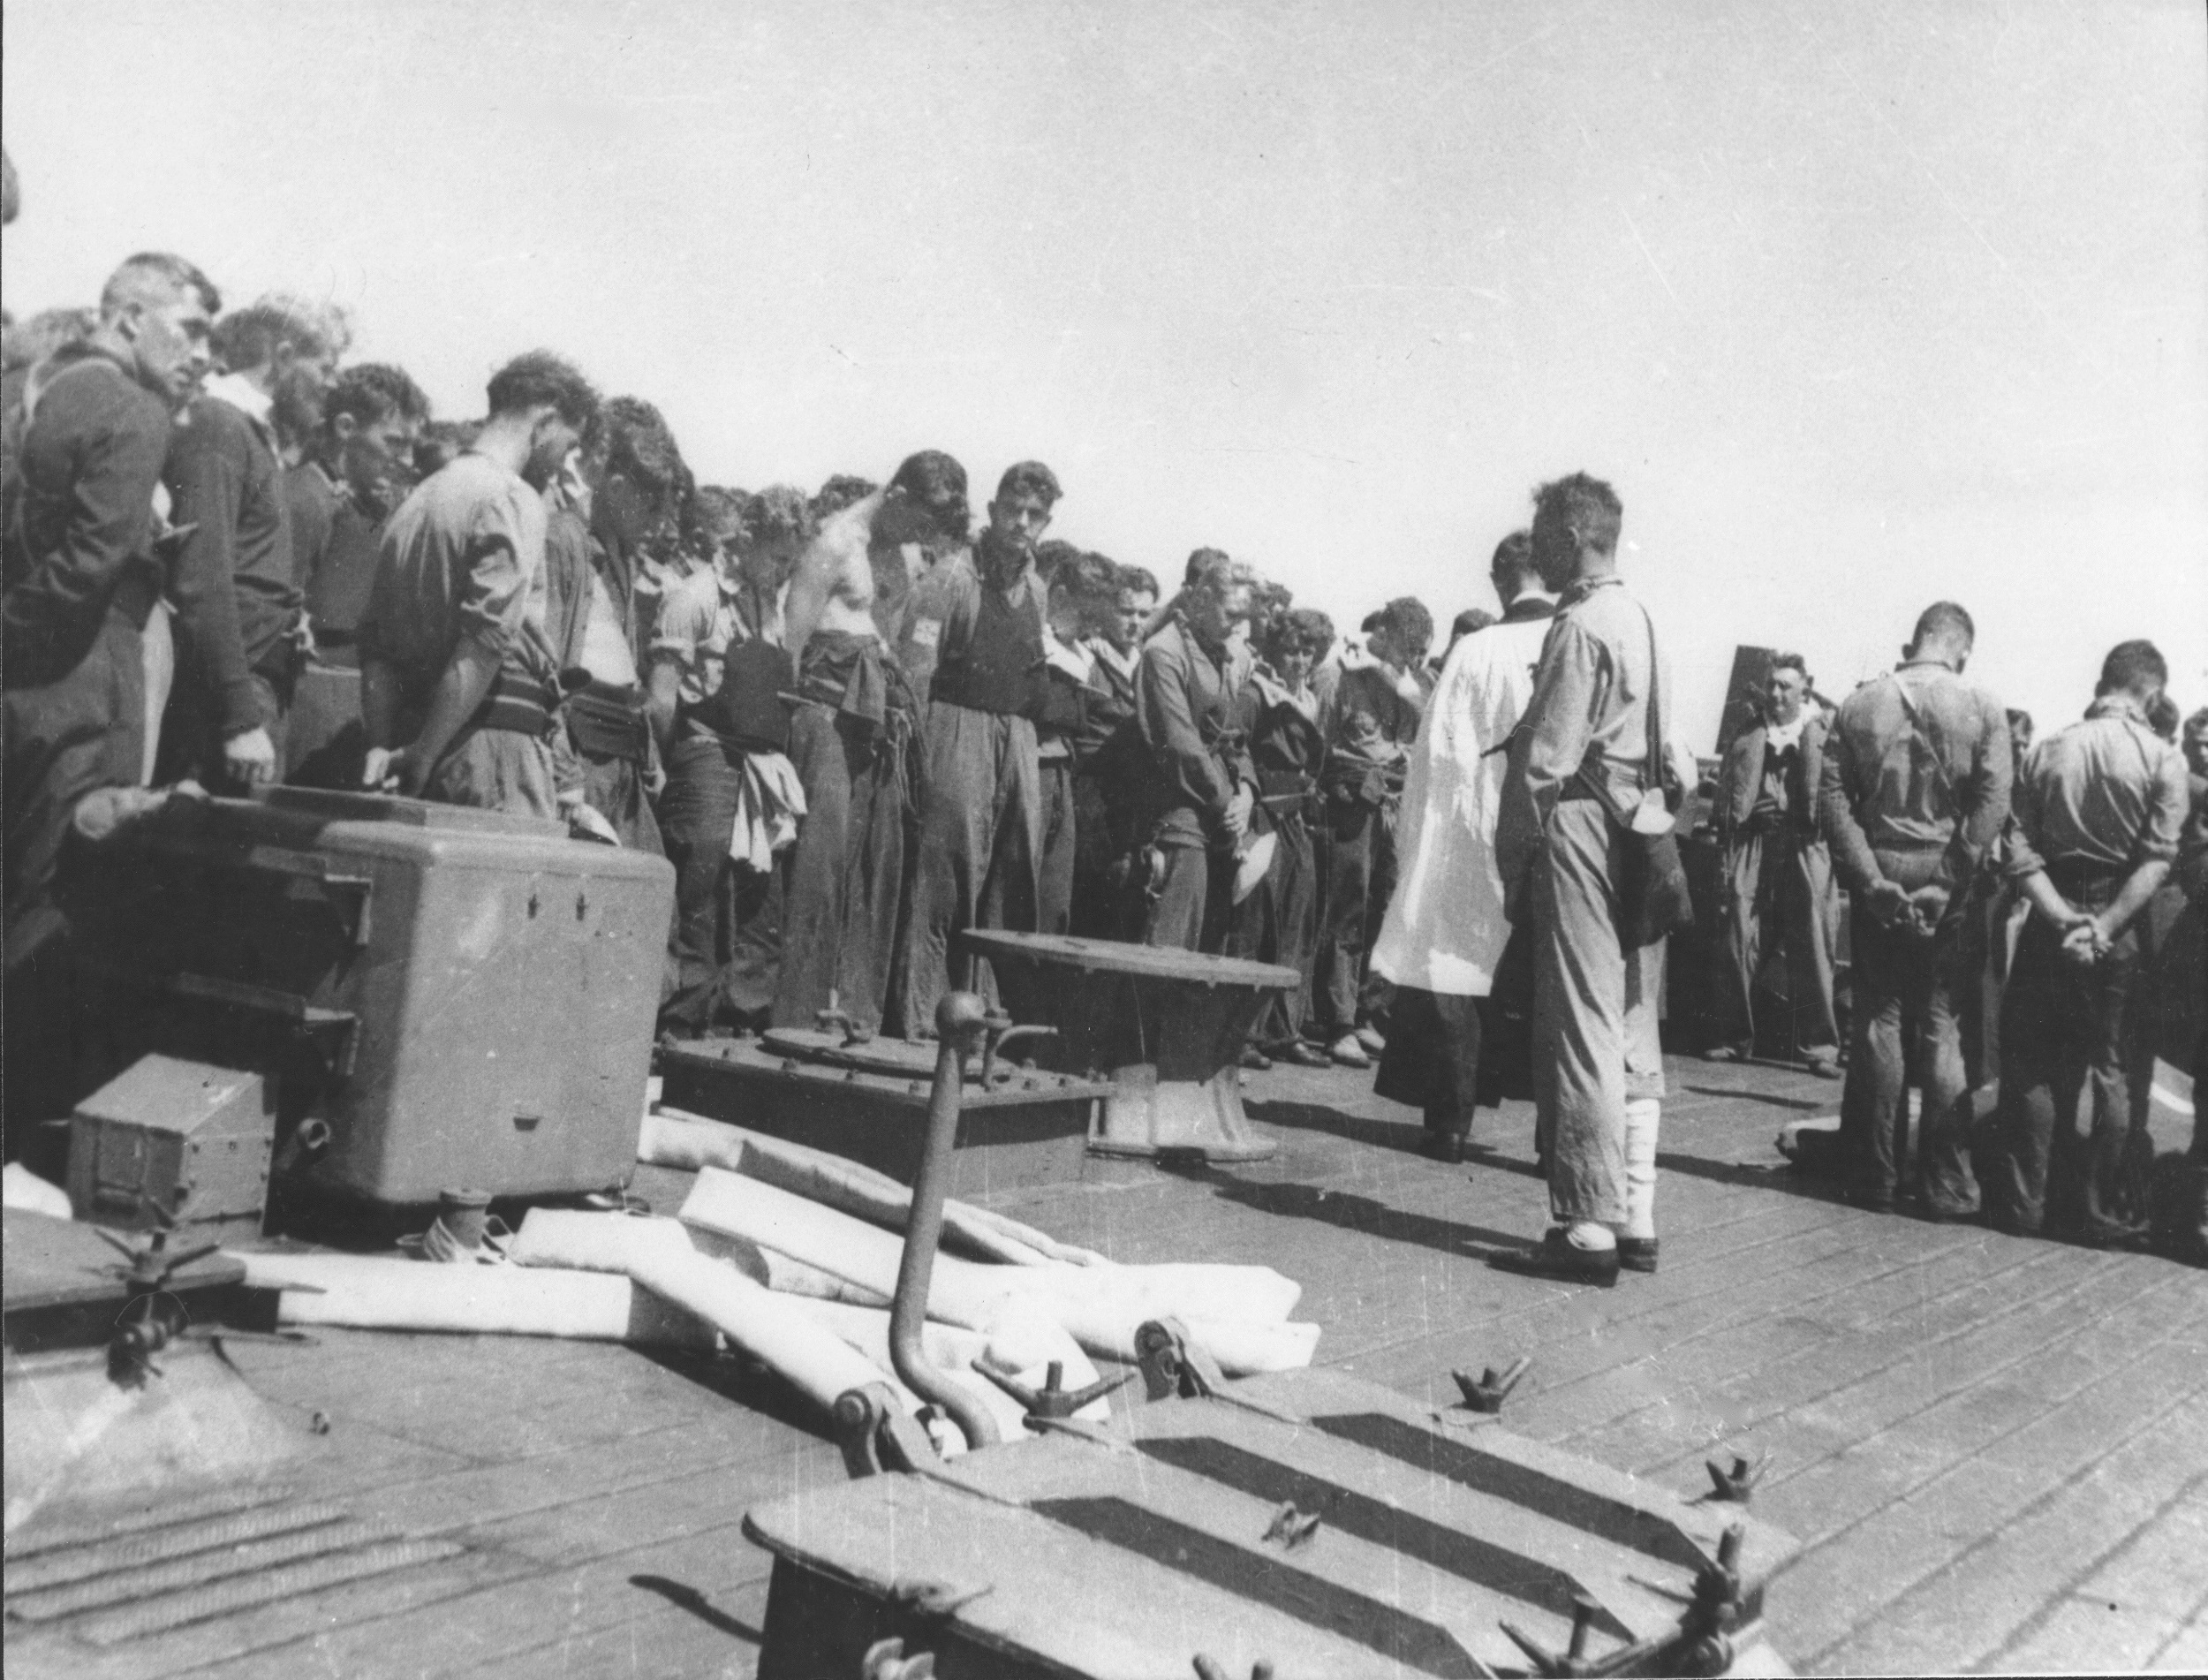
Through what can only be described as superhuman efforts, the men managed to get some of the engines and power systems working and Leander slowly steamed back to Tulagi. She arrived in the dark at 7pm and a service was immediately held for the men who had been killed.
Commodore Richard Hale, a Sub-Lieutenant during the action recalled, “We arrived at the anchorage in falling light. The Bishop of Melanesia, Bishop Baddeley along with our Padre Claude Webster had prayers on the foc’sle for the dead and gave thanks for the safety of the ship. I have never attended a more moving service, the light was only that of the moon and the stars, hymns sung were those that were known well to us and it was a completely informal, very moving, very sincere short service.”
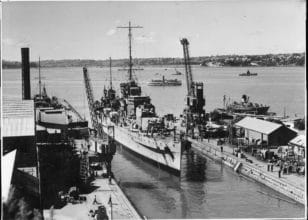
HMNZS Leander entering dry dock in Auckland for repairs – view gallery of images
After some temporary repairs, Leander sailed to Auckland where she entered the dry-dock at the Devonport naval base. There, sailors had the gruesome task of recovering the remaining six bodies from the boiler room, where they had remained entombed since the battle. Once it was established that the repairs were too extensive to be undertaken in Auckland, the Admiralty ordered the cruiser be made seaworthy for a voyage to Boston were she could undergo full repairs. HMNZS Leander would end her service with the RNZN in late 1943.
HMNZS Leander’s actions at the Battle of Kolombangara remain one of the Royal New Zealand Navy’s finest moments in the Second World War. It remains a classic example of effective damage control and is still taught to today’s sailors in our modern navy.
By Michael Wynd, Researcher – The National Museum of the Royal New Zealand Navy
Footnote:
Eighteen of the men killed at the Battle of Kolombangara who were either buried or lost at sea, are remembered on the New Zealand Naval Memorial at Devonport Naval Base. Two others are remembered on the Portsmouth Naval Memorial in the UK. Three men whose bodies were recovered are buried at the Bourail NZ War Cemetery in New Caledonia. The remaining men are buried in either Waikumete Cemetery in Auckland or in Anderson’s Bay and Dunedin North Cemeteries.
View images of HMNZS Leander at and after the Battle of Kolombangara.
More to explore.

First Aid at Sea in the Second World War
Medical personnel played a vital role at sea during the Second World War.
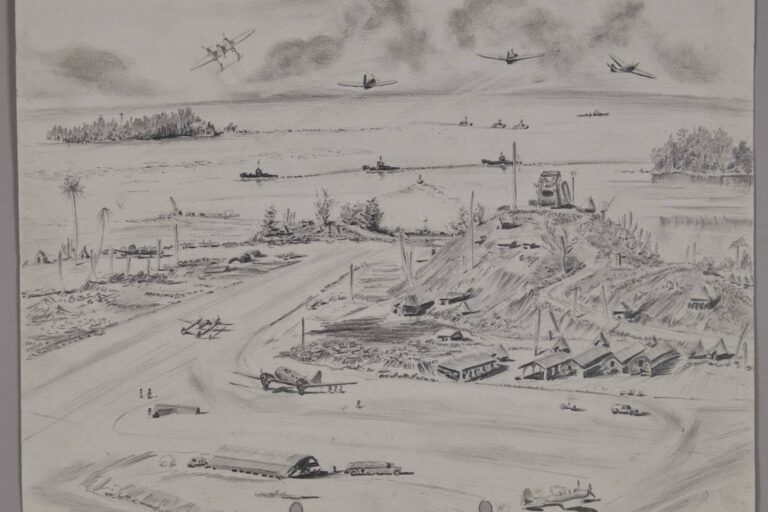
The Wartime Artwork of Owen (Miles) Spence
A selection of drawings from Owen (Miles) Spence from the Navy Museum collection.

The scuttling of the Graf Spee video
Short video of the scuttling of the Battleship the Admiral Graf Spee.

A sailor’s diary – Battle of Kolombangara
AB Johnstone remembers the Battle of Kolombangara in his diary.
")
Operation Struggle
Midget submarine XE3 carried out a successful attack on a Japanese cruiser.

Signalling Victory and Survival
White Ensign made by New Zealanders in a Japanese POW Camp.

Suitcase with a story
This small brown suitcase has a fascinating story from WW2.

Wrens
Brief history of women’s war service in New Zealand Navy.

Cup and Saucer
Cup and saucer from ‘Paragon Patriotic’ series World War Two.

Images from Battle of the River Plate
Gallery of images from the Battle of the River Plate.

Torpedo Sight
The torpedo sight improved the accuracy of firing torpedoes.

Naval Aviation WW2
Leander and Achilles both carried Walrus aircraft during World War Two.

Remembering a Naval Hero
LT CDR Macdonald invented torpedo sight for motor torpedo boats.

Nurse’s Uniform
Royal New Zealand Nursing Corps World War Two uniform.

Gloves
Gloves used for handling mines in WW2 issued to S/LT Taylor.

Veteran shares memories
WW2 veteran Brian Breen remembers his time in HMNZS Leander.

Remembering the Battle of Kolombangara
HMNZS Leander saw action in Battle of Kolombangara.

Images Battle of Kolombangara
Images from Battle of Kolombangara of Leander crew July 1943.

Medal mystery
Collections team solves a medal mystery that links two sailors.

Make and Mend
During Make and Mend once a week sailors repaired uniforms.